Weekly Progress Update
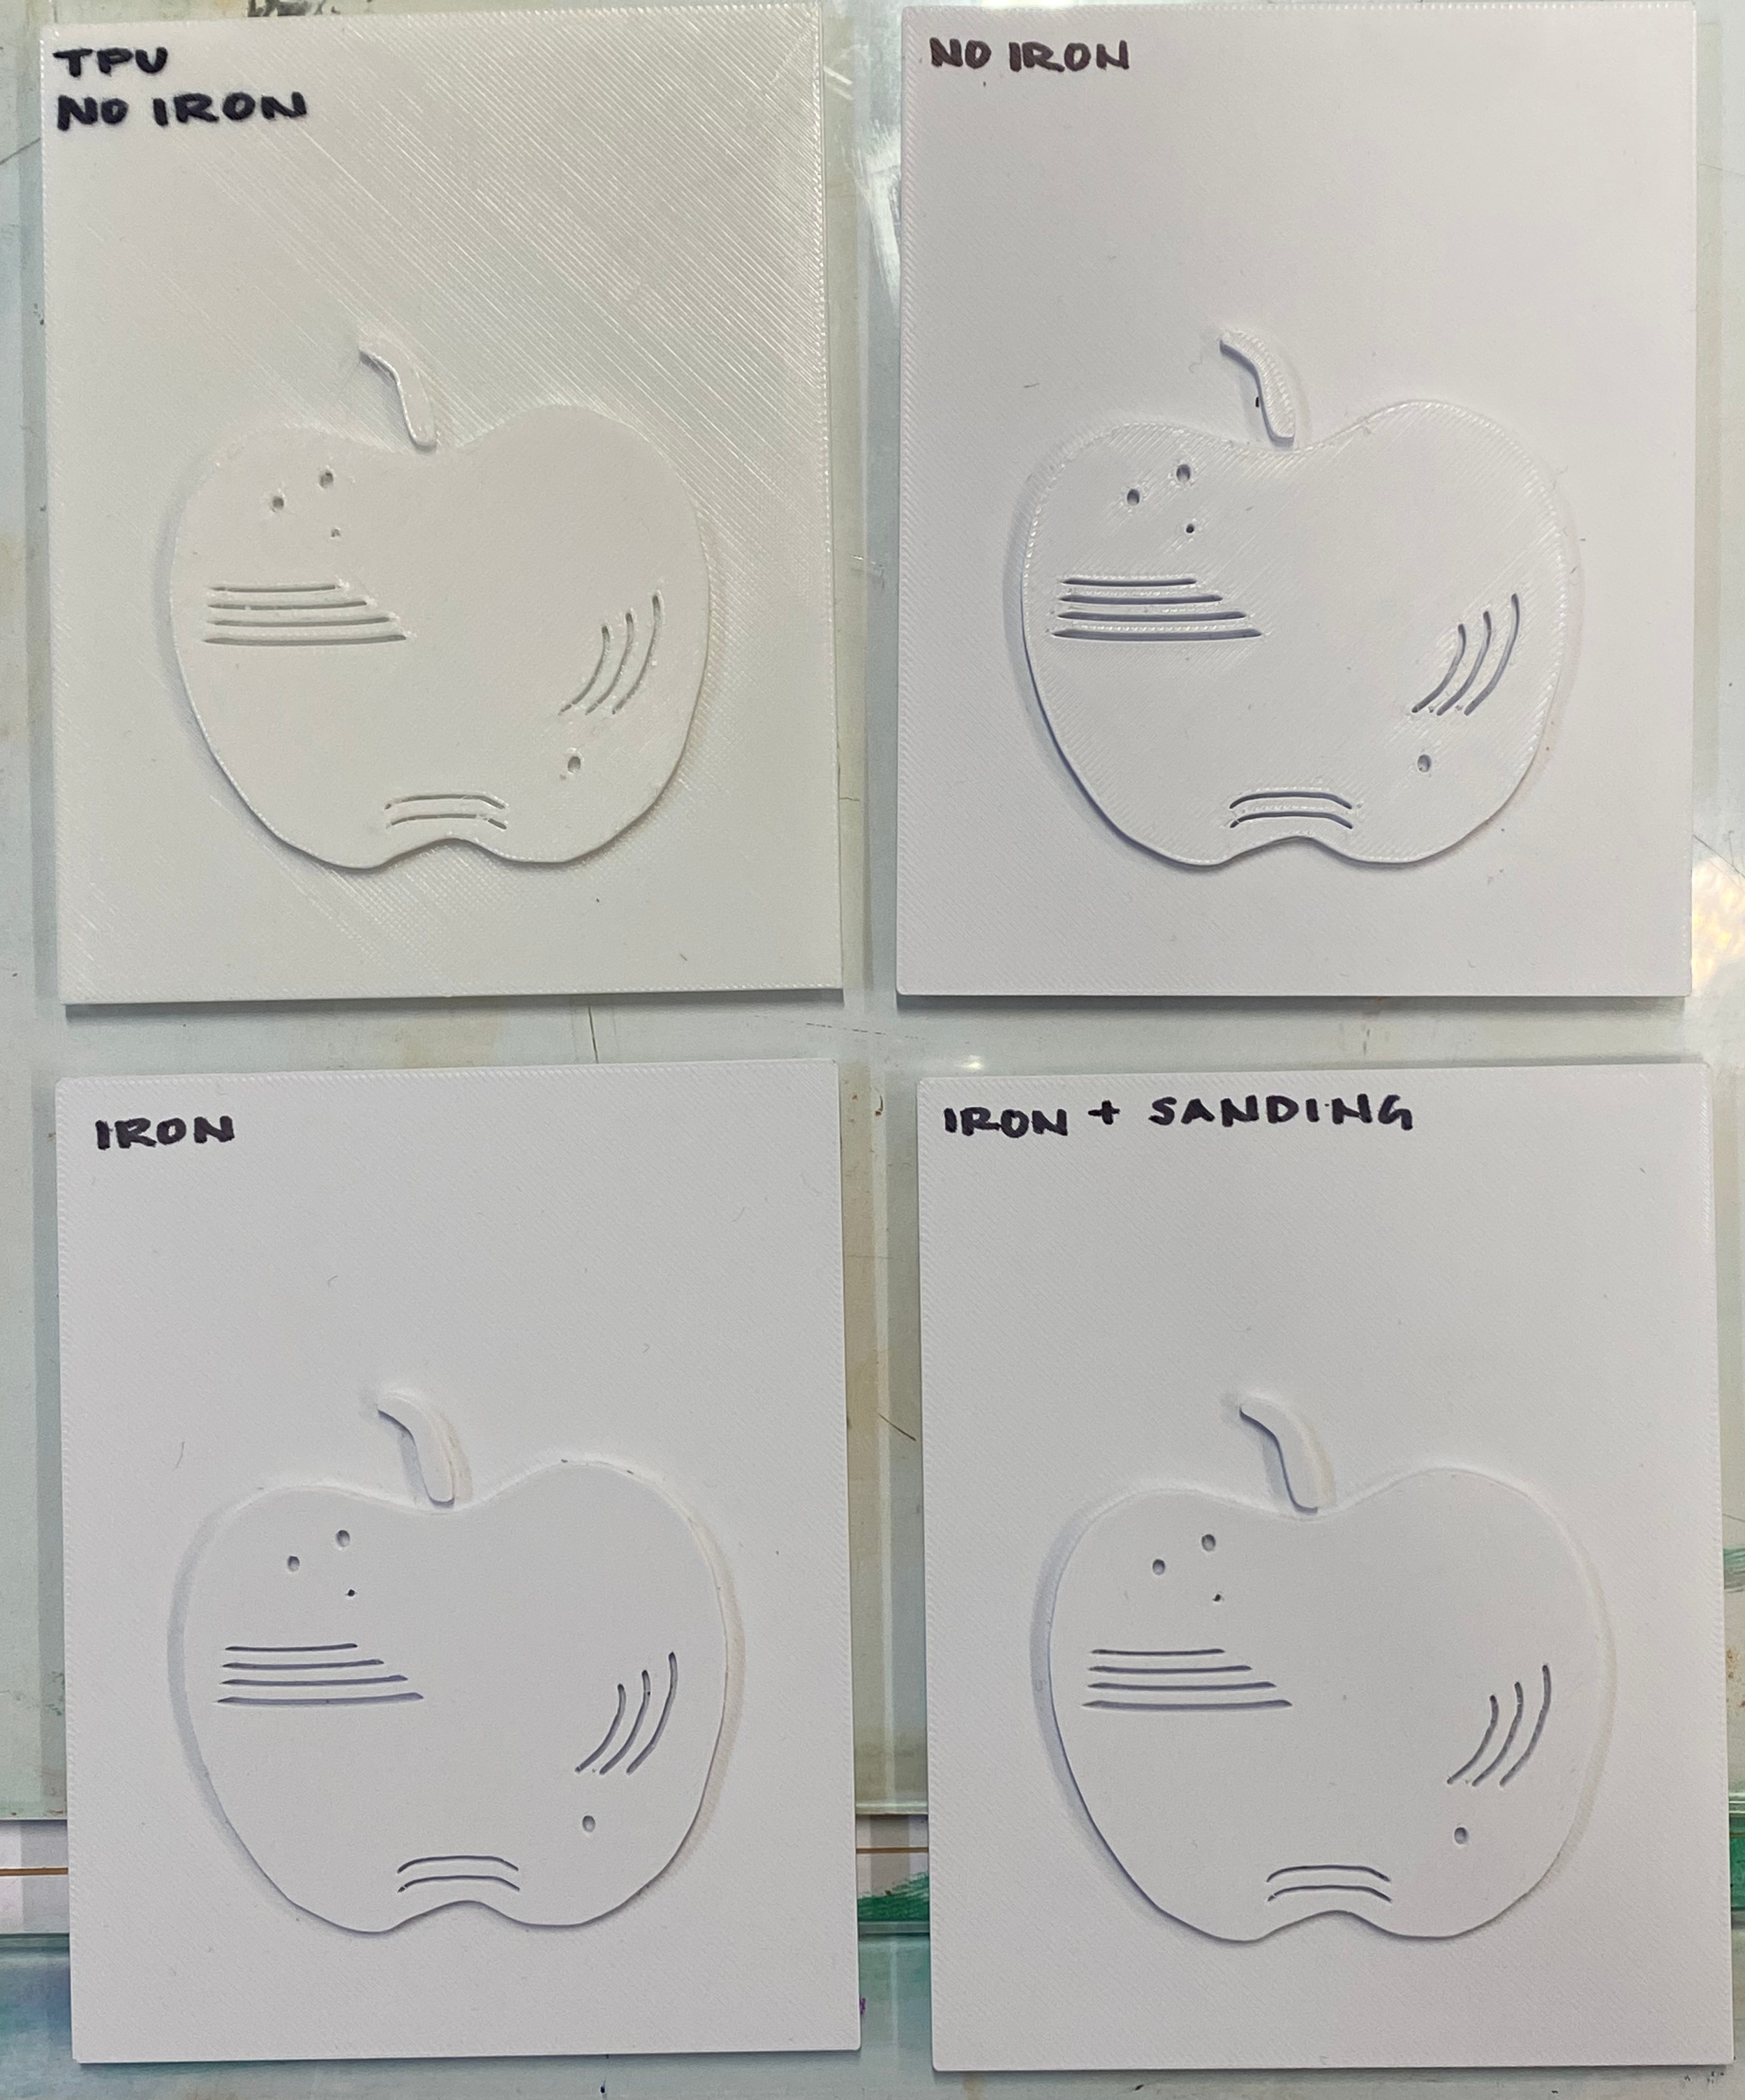
A lot of progress and discovery have been made since my last weekly progress update. For one, I finally learned the most basic 3D-printing skills in TinkerCad, which I found to be a very beginner-friendly website (for those who are interested in giving this a try, it’s also free, which is a major plus!). While I couldn’t import my Apple Sketch into the program, I was able to overlay an image of my sketch in a different window. First, I created a 5” x 4” base that would be set to 1mm tall. From there, I used the Extrude Sketch feature -> Smooth Curves -> and drew my apple with various data points. The design will then be set to 2mm tall, allowing the ink to be easily rolled onto the tallest part of the surface. I also decided to use this prototype to test details. As you can see in my design (see below), I created various marks, such as “cross-hatchings” and holes of different lengths and sizes, to test what the 3D printer can and can’t print. This was done by messing around with the solid (what’s being printed) and hole (what’s not being printed) features in TinkerCad.
After creating my sketch in TinkerCad, I exported the STL file, which I will then upload to the Bambu Lab software for 3D printing. From there, I turned on the “iron” setting for my plate on the tallest surface of the design. Then I sent the design to the actual 3D printer. I printed two PLA ironed plates, one PLA no-iron plate, and a TPU no-iron plate. The PLA plates took approximately 30-40 minutes to print, whereas the TPU took 1 hour and 30 minutes. However, that isn’t unusual for TPU filament since its rubbery texture requires a slower speed to prevent jamming and stringing.
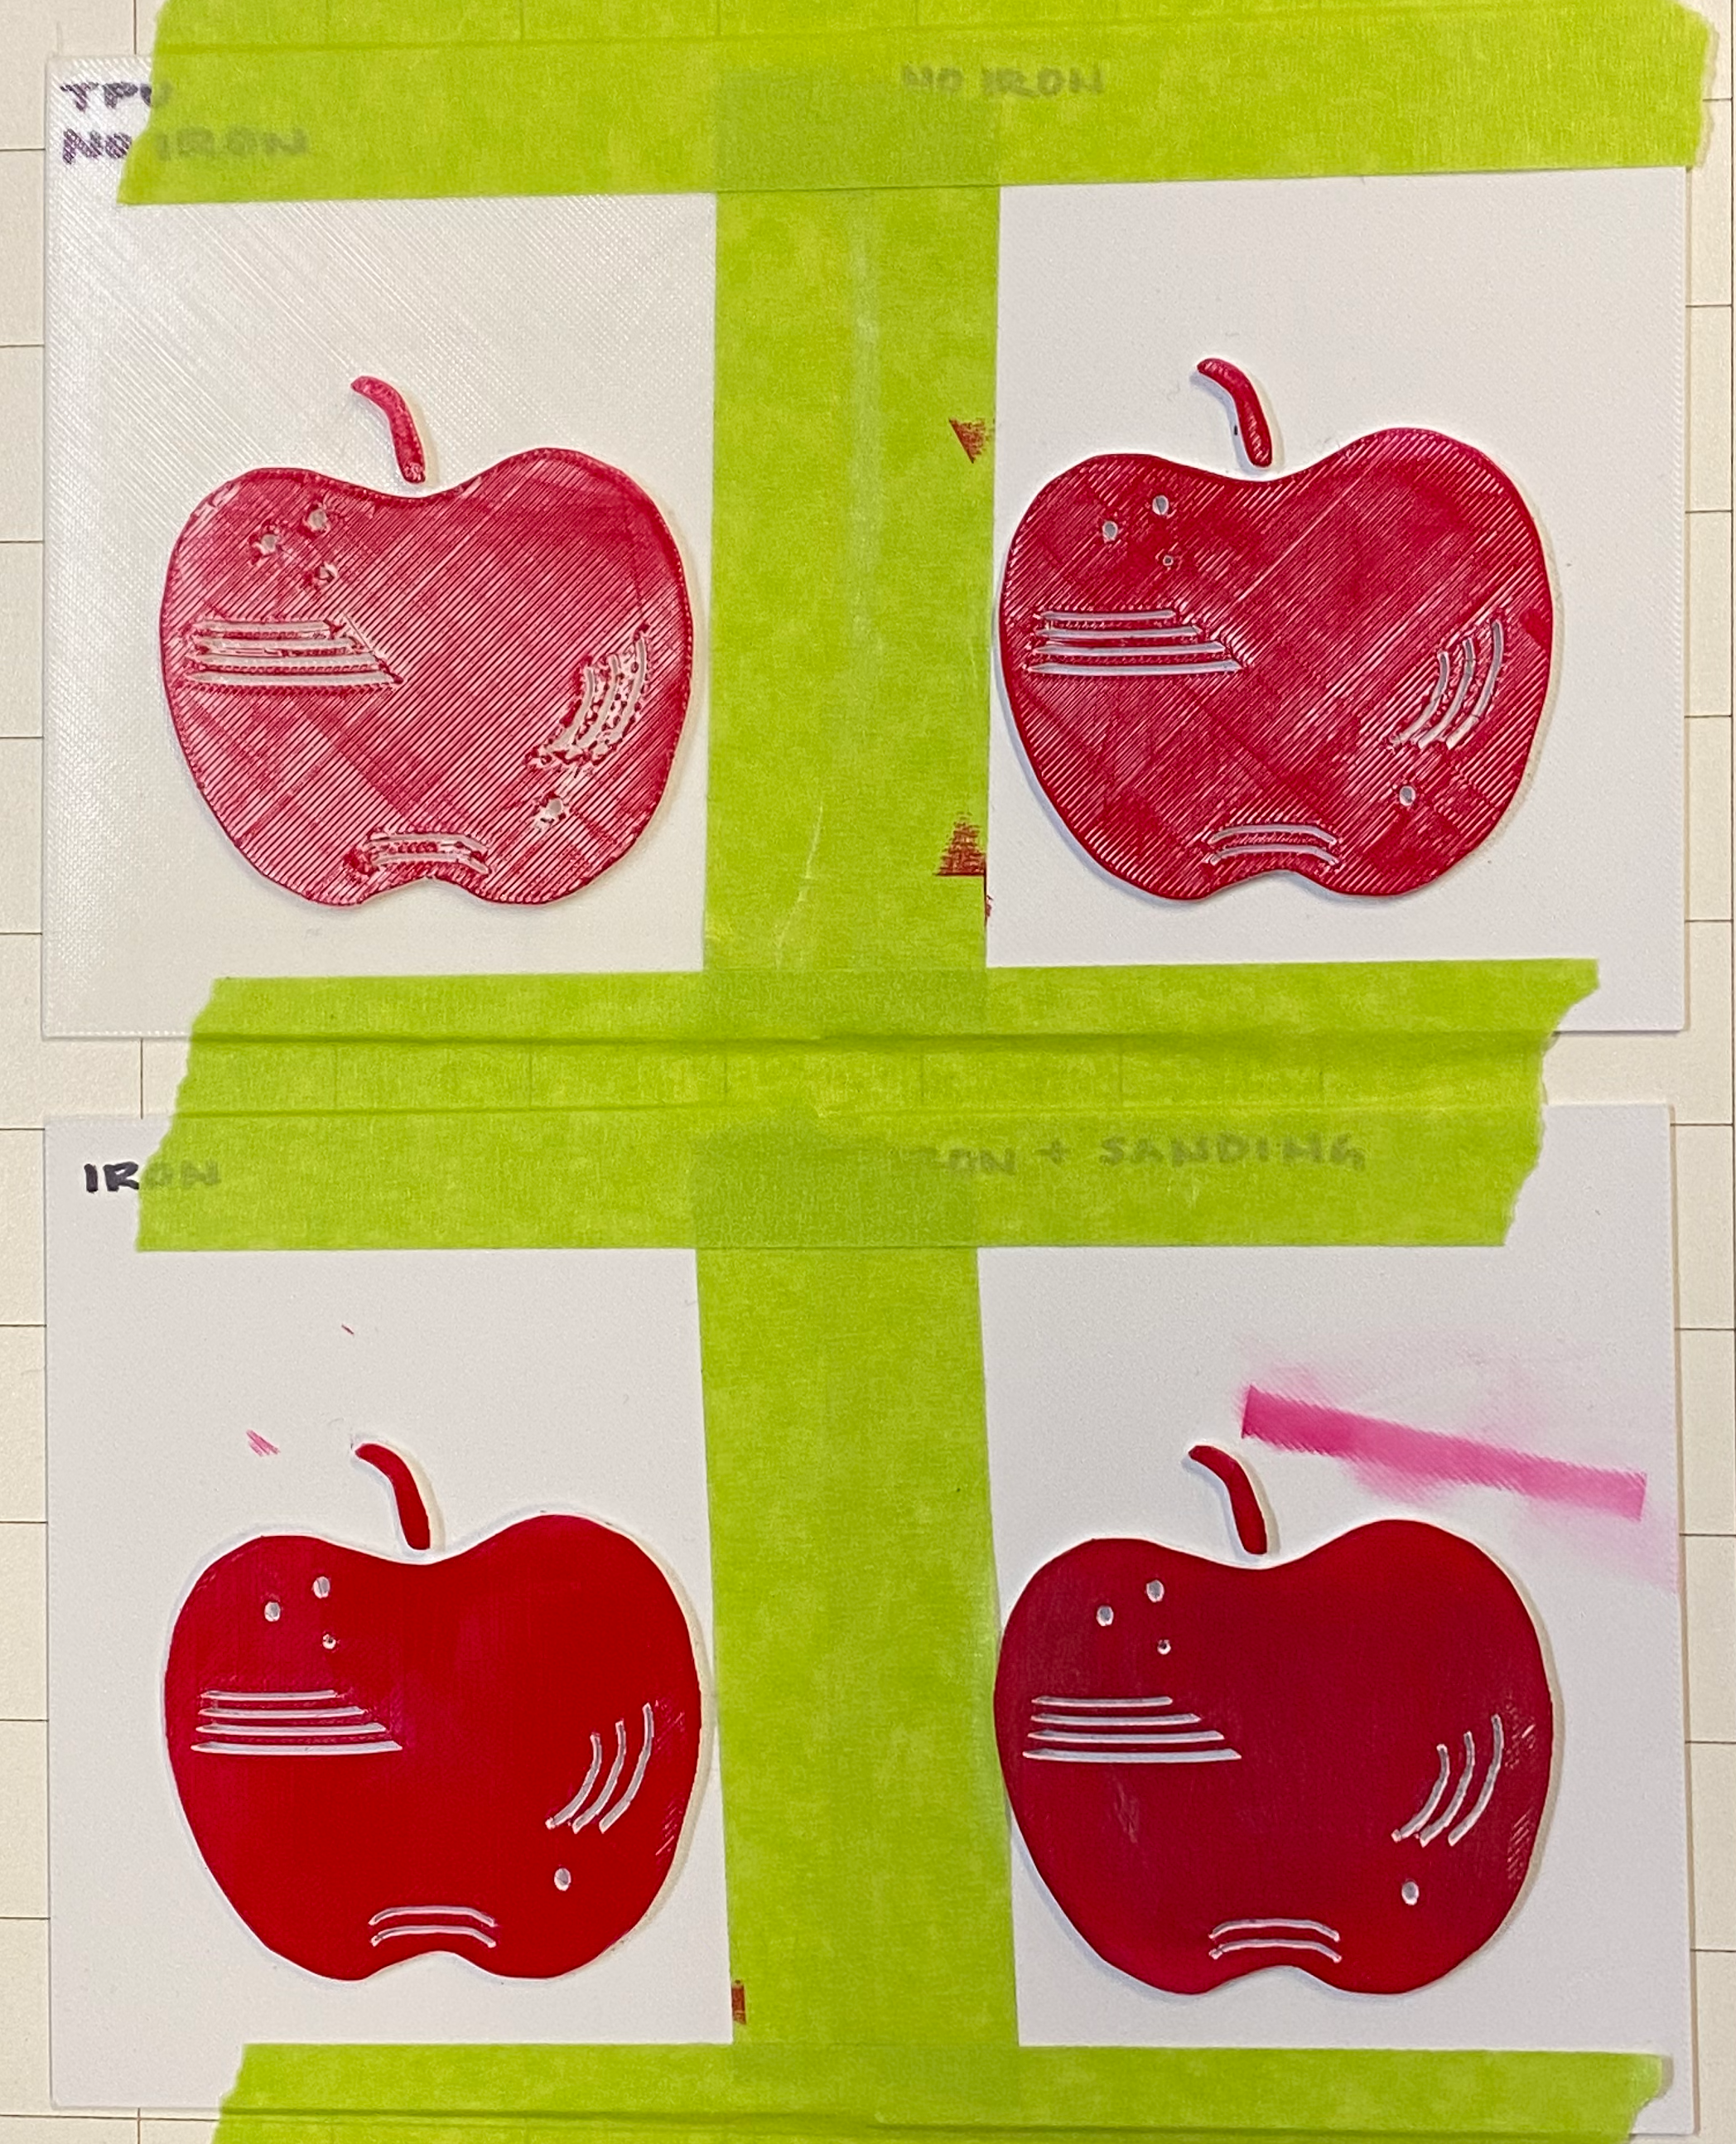
Once all test plates were finished printing on Tuesday and Thursday, I started the printing process to see which plates printed well on the letterpress and how well they took oil-based and water-soluble inks. Tuesday, Rafael and I prepped the letterpress bed to ensure the 3mm plates were close to type high, allowing the barrel to apply pressure to the plates and effectively transfer the inked design to the paper. This also required a lot of padding to ensure sufficient pressure was applied, allowing for fewer passes with the barrel.
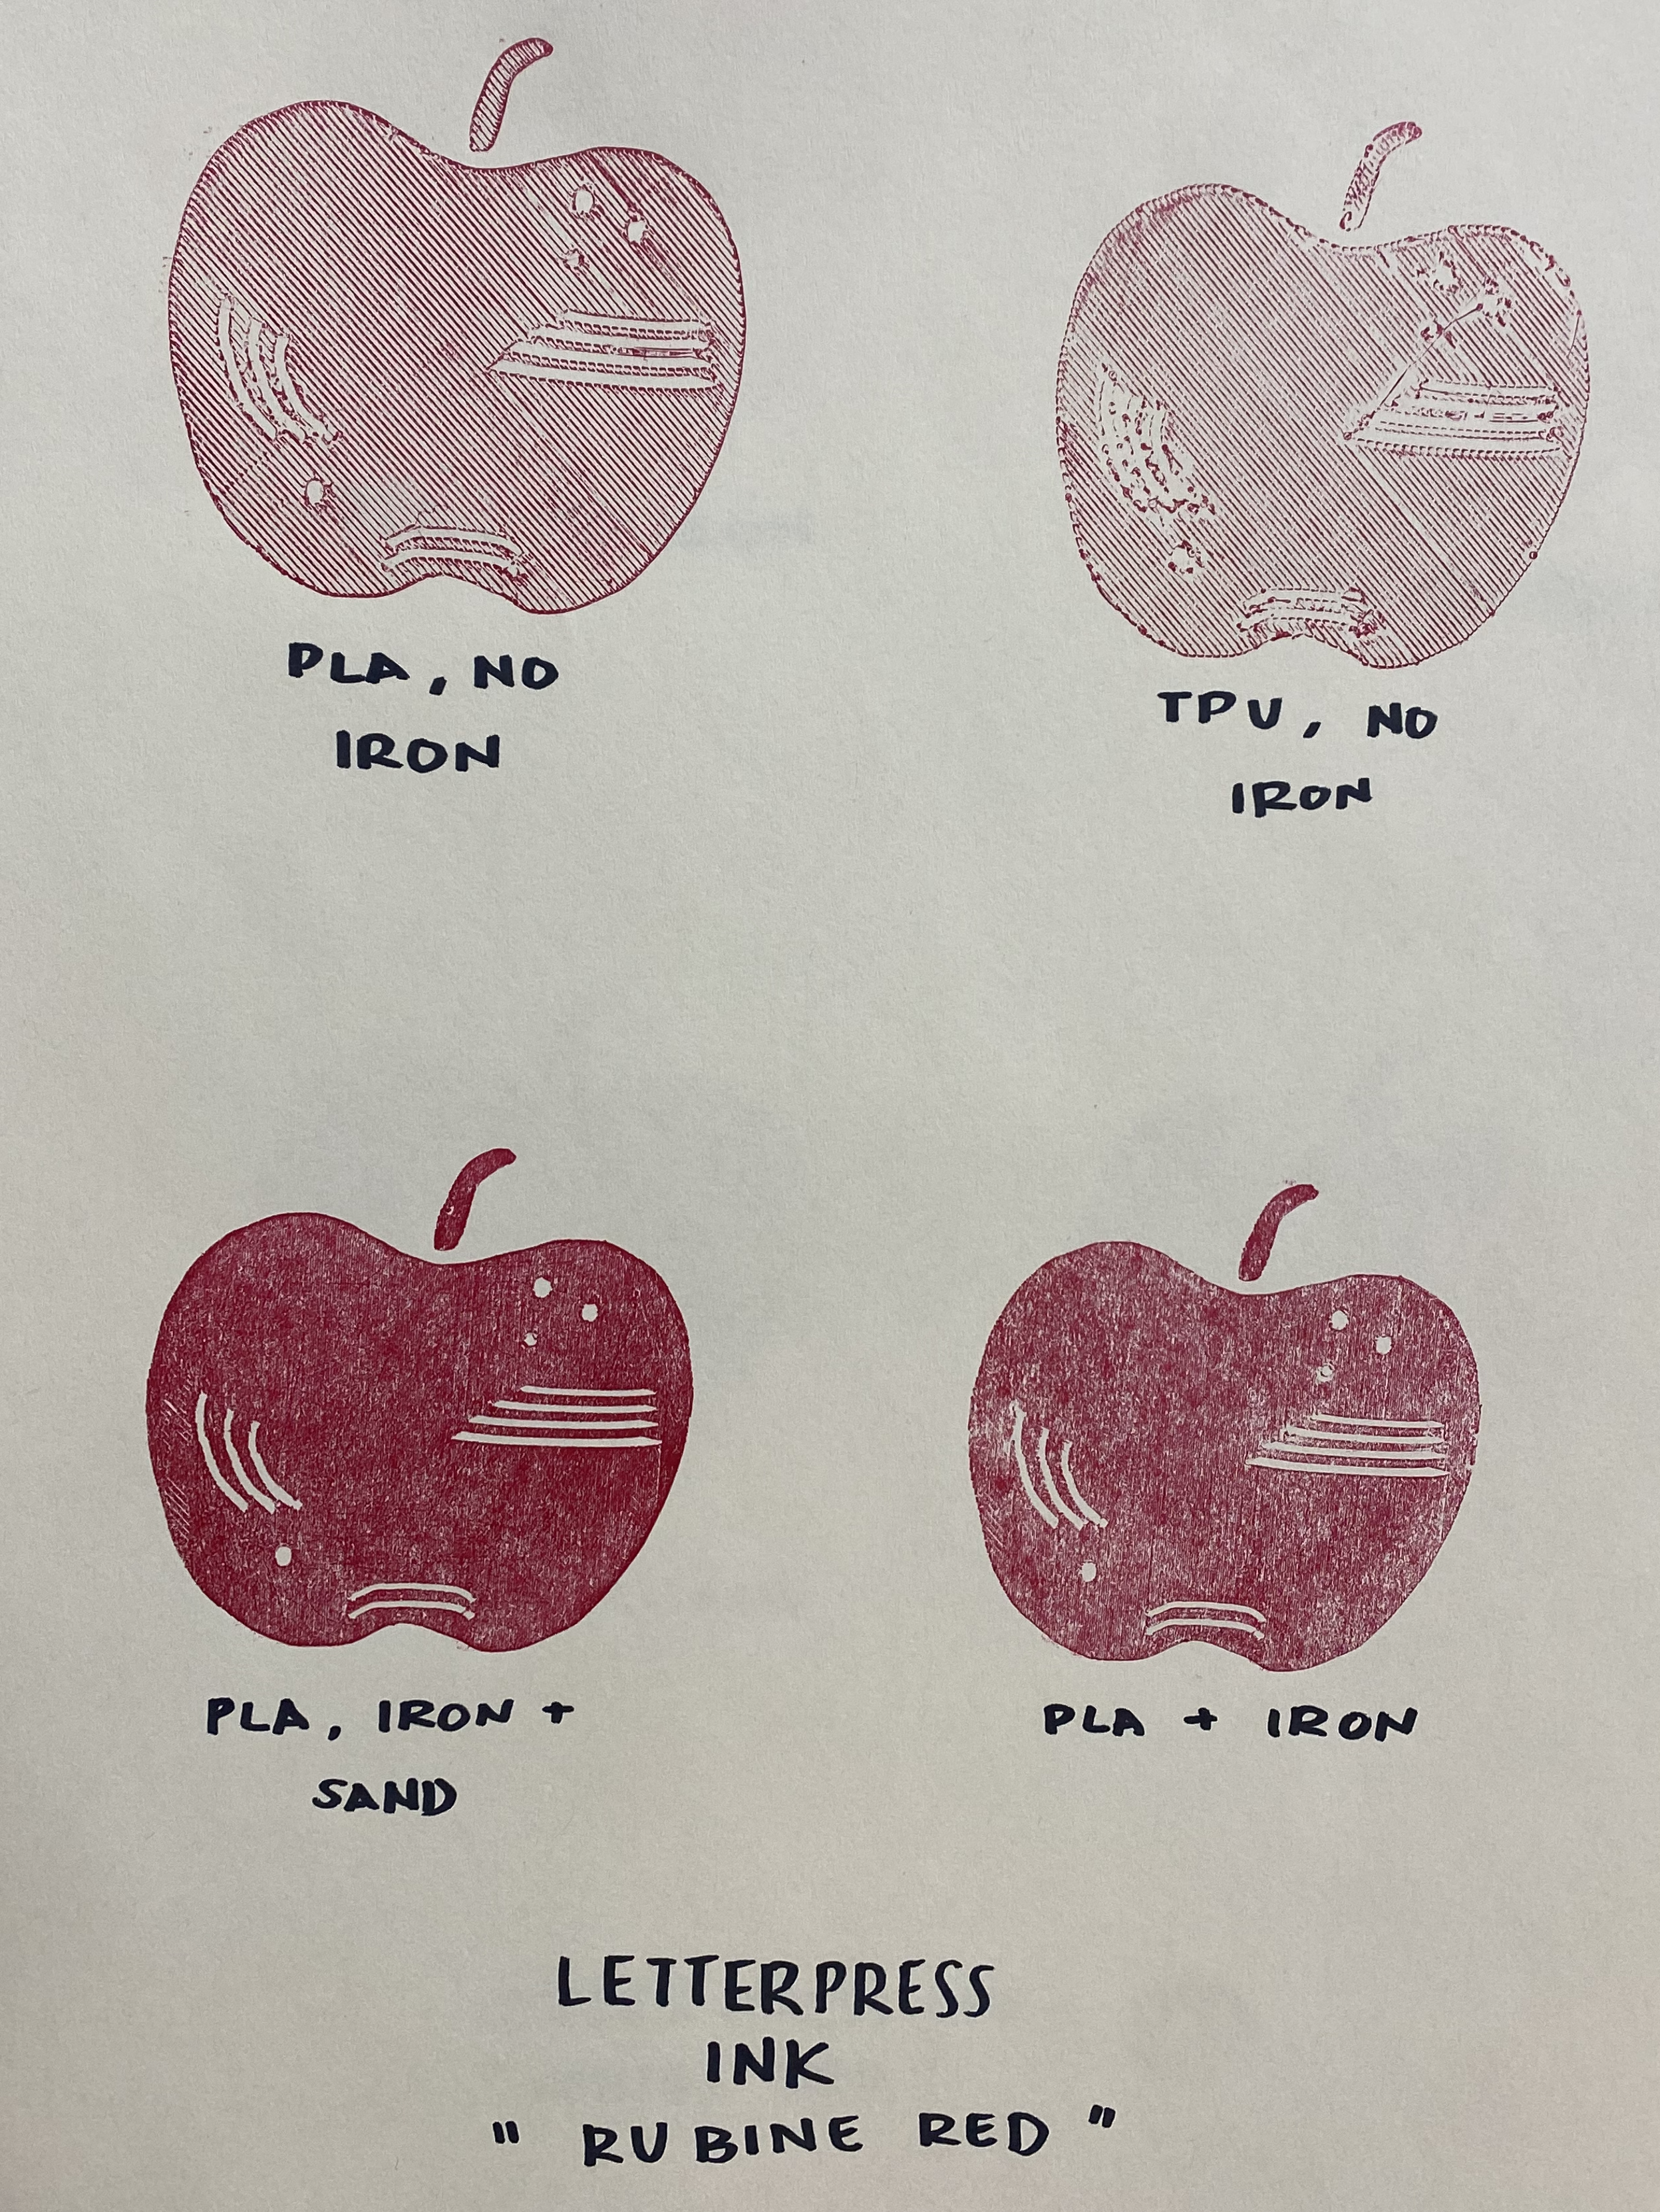
From there, I was able to start printing. My first test was with letterpress ink, an oil-based ink, from Southern Ink in “Rubine Red.” I’ve inked the 3D-printed plates the same way I would with regular linoleum blocks. After each block was inked, I used Springhill Digital 11” x 17” paper to print, then padded it with a stack of office paper. After rolling the barrel over the blocks twice, this is the result I got from the prints. The results were interesting to look over! TPU had an interesting blur-like effect compared to its PLA no-iron counterpart, which was more defined with its texture offering something similar to chatter in a carved linoleum block. As for iron vs iron + sanding, iron + sanding definitely held the ink better.
After printing the first batch, I cleaned my plates with vegetable oil and let them air-dry before moving on to the next printing experiment. For reference, artist Peter Prodoehl (mentioned in an earlier blog) used water-soluble inks for his 3D-printed plates, and it seemed to work with his process, so that was the next experimental ink!
I do think it’s important for me to note the differences between oil-based and water-soluble inks for those not familiar with printmaking. Water-soluble inks use water as a solvent, making cleanup easier (with water and soap) and allowing them to dry quickly, which is good if you want to print multiple layers without waiting in between. However, the colors are more prone to bleeding and lack color intensity. With oil-based inks like letterpress and relief, it’s thicker than water-soluble inks, leading to longer drying times but richer color. Usually, printmakers opt for oil-based inks for their color and ability to capture finer details. Also, oil-based inks don’t dry quickly; you can walk away from your station for a few minutes/hour without them drying out, or even save your ink in foil or a container for the next day or week. With water-soluble inks, they dry fast as you’re working, which makes producing editions (series of your prints) longer and eventually using more product than oil-based inks, where “a little goes a long way.” I know it sounds like I’m saying, “Use oil-based inks, it’s better,” I do believe water-soluble inks are an inexpensive and beginner-friendly way to get into printmaking. It’s what works best for you and your particular use or practice.
Another important thing to mention was that the water-soluble experiment couldn’t be done on the letterpress. Since its solvent is water and it’s cleaned off with water, if too much water gets onto the letterpress, it might cause future rust. So this experiment was done by handprinting with a wooden spoon. Handprinting can be done with either a baren or the back of a wooden spoon, as long as the pressure is controlled and done in a consistent circular motion for even pressure/transfer.
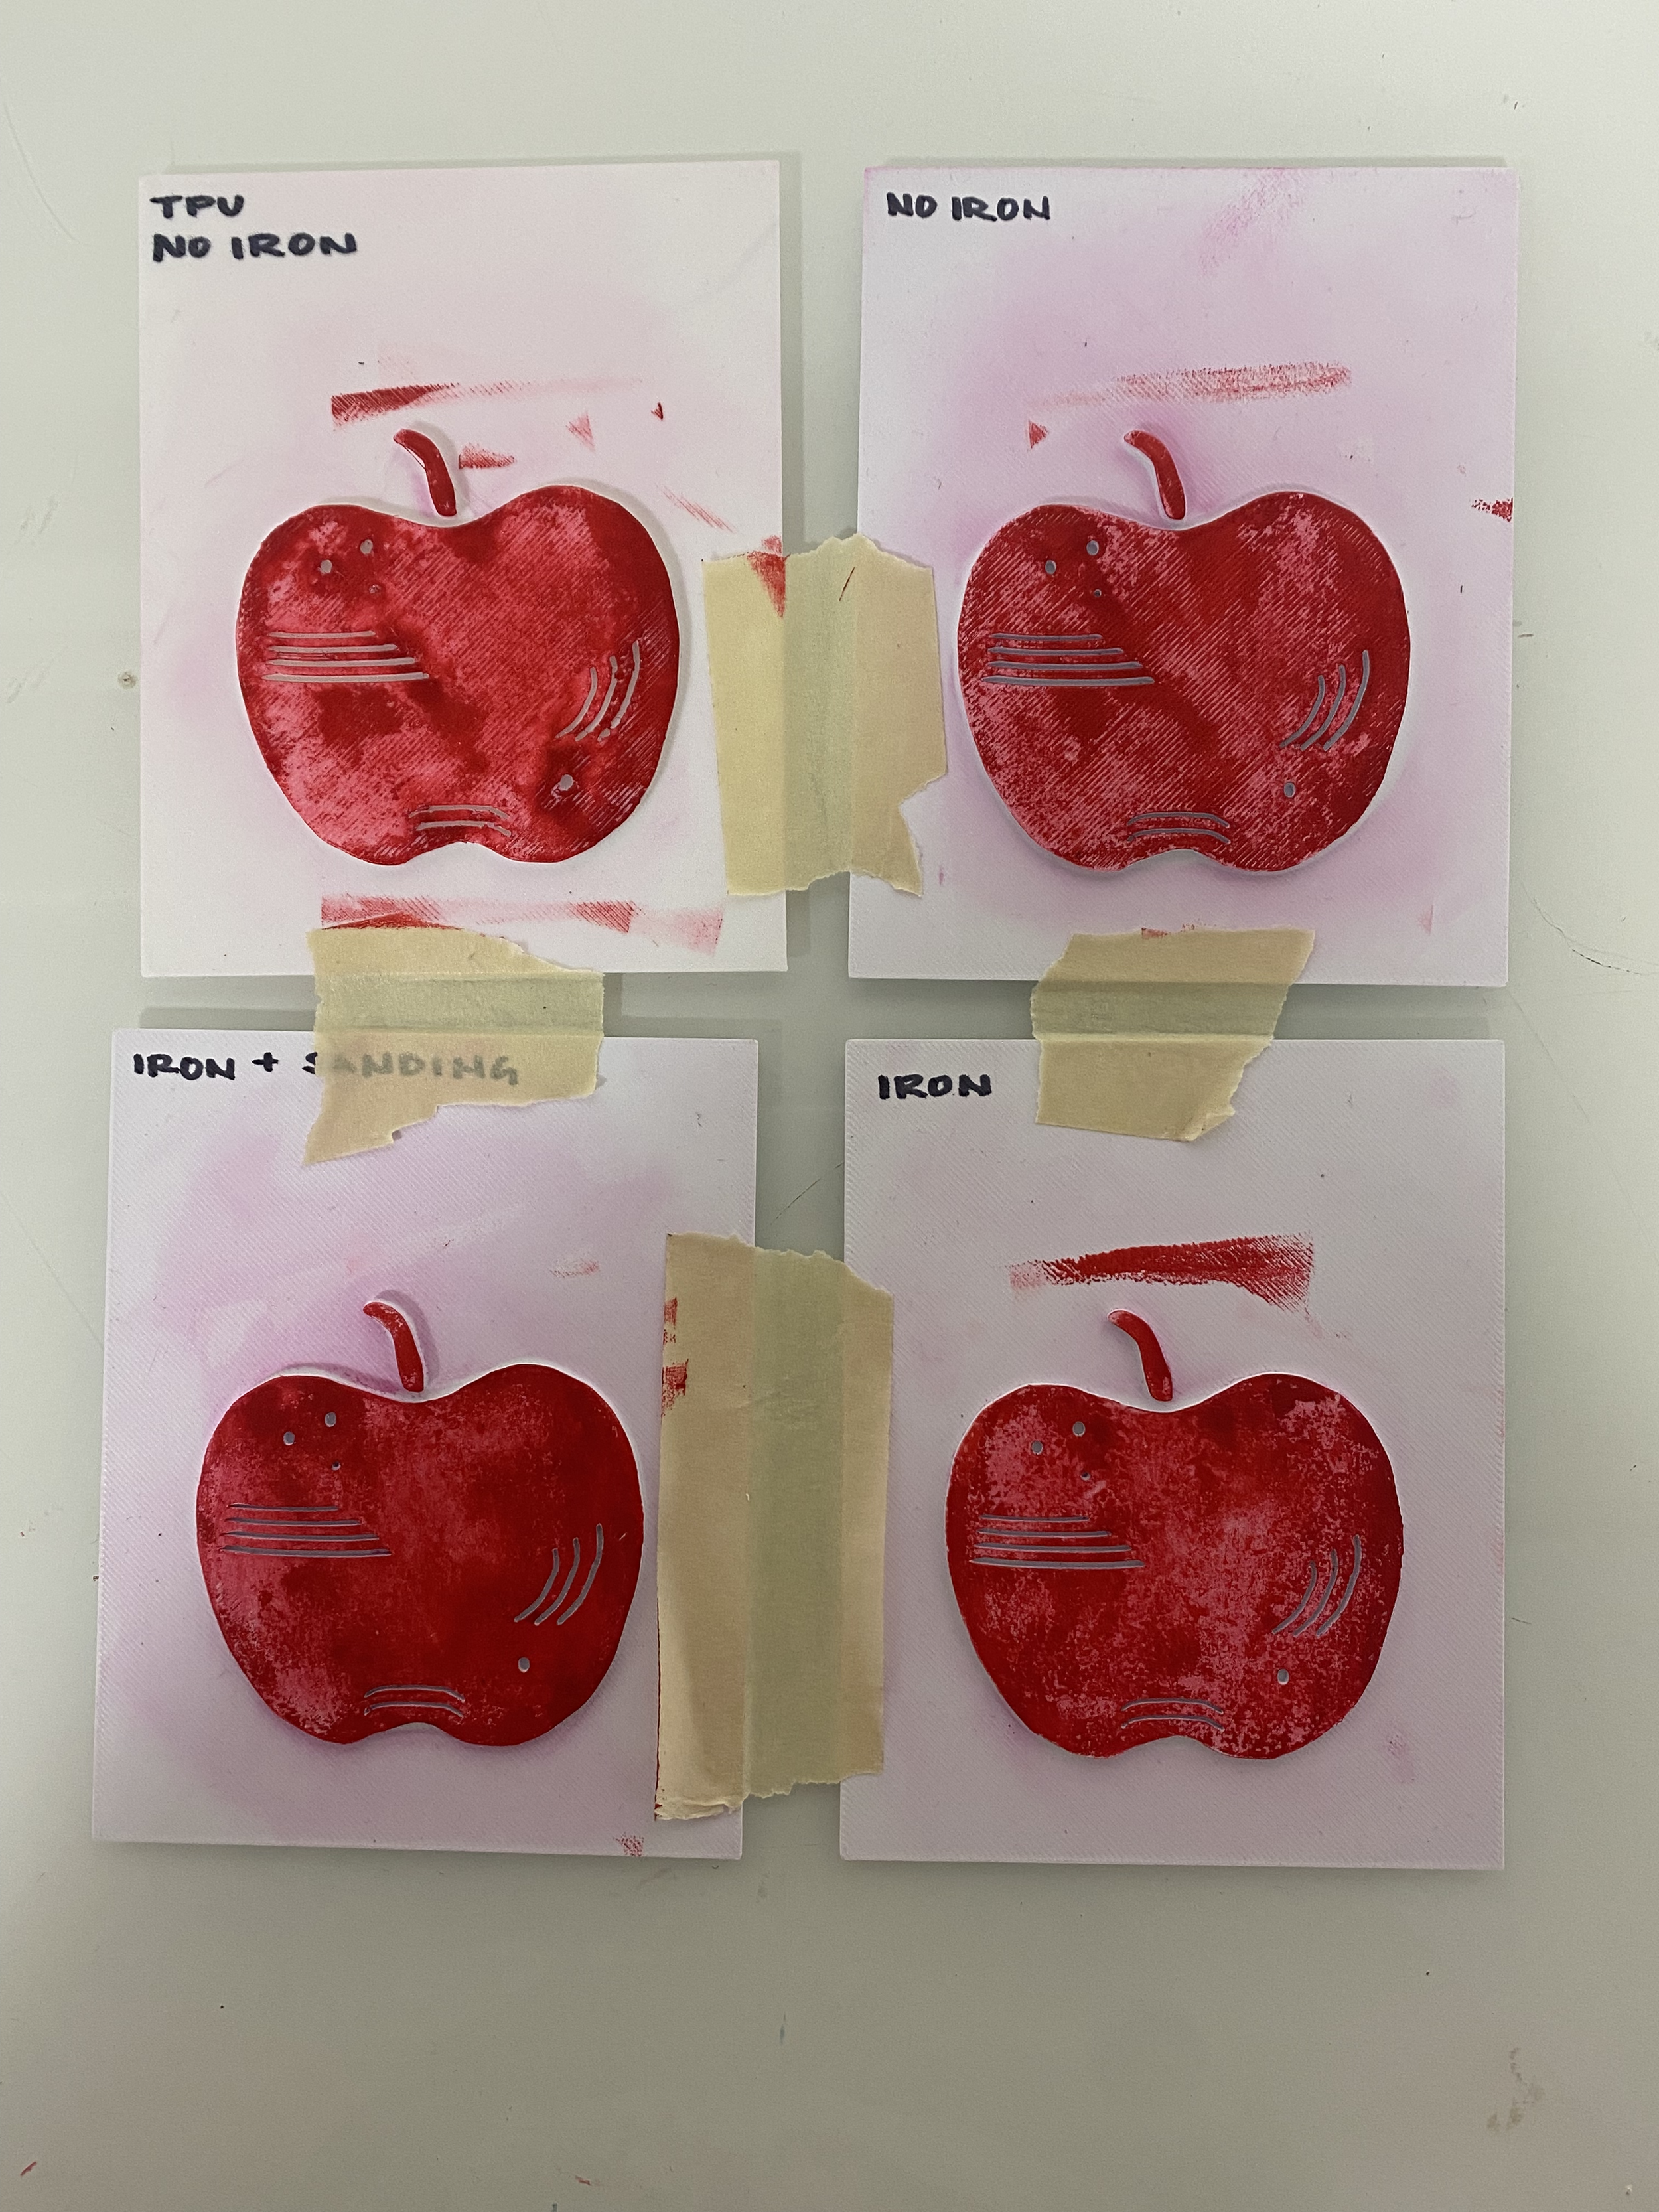
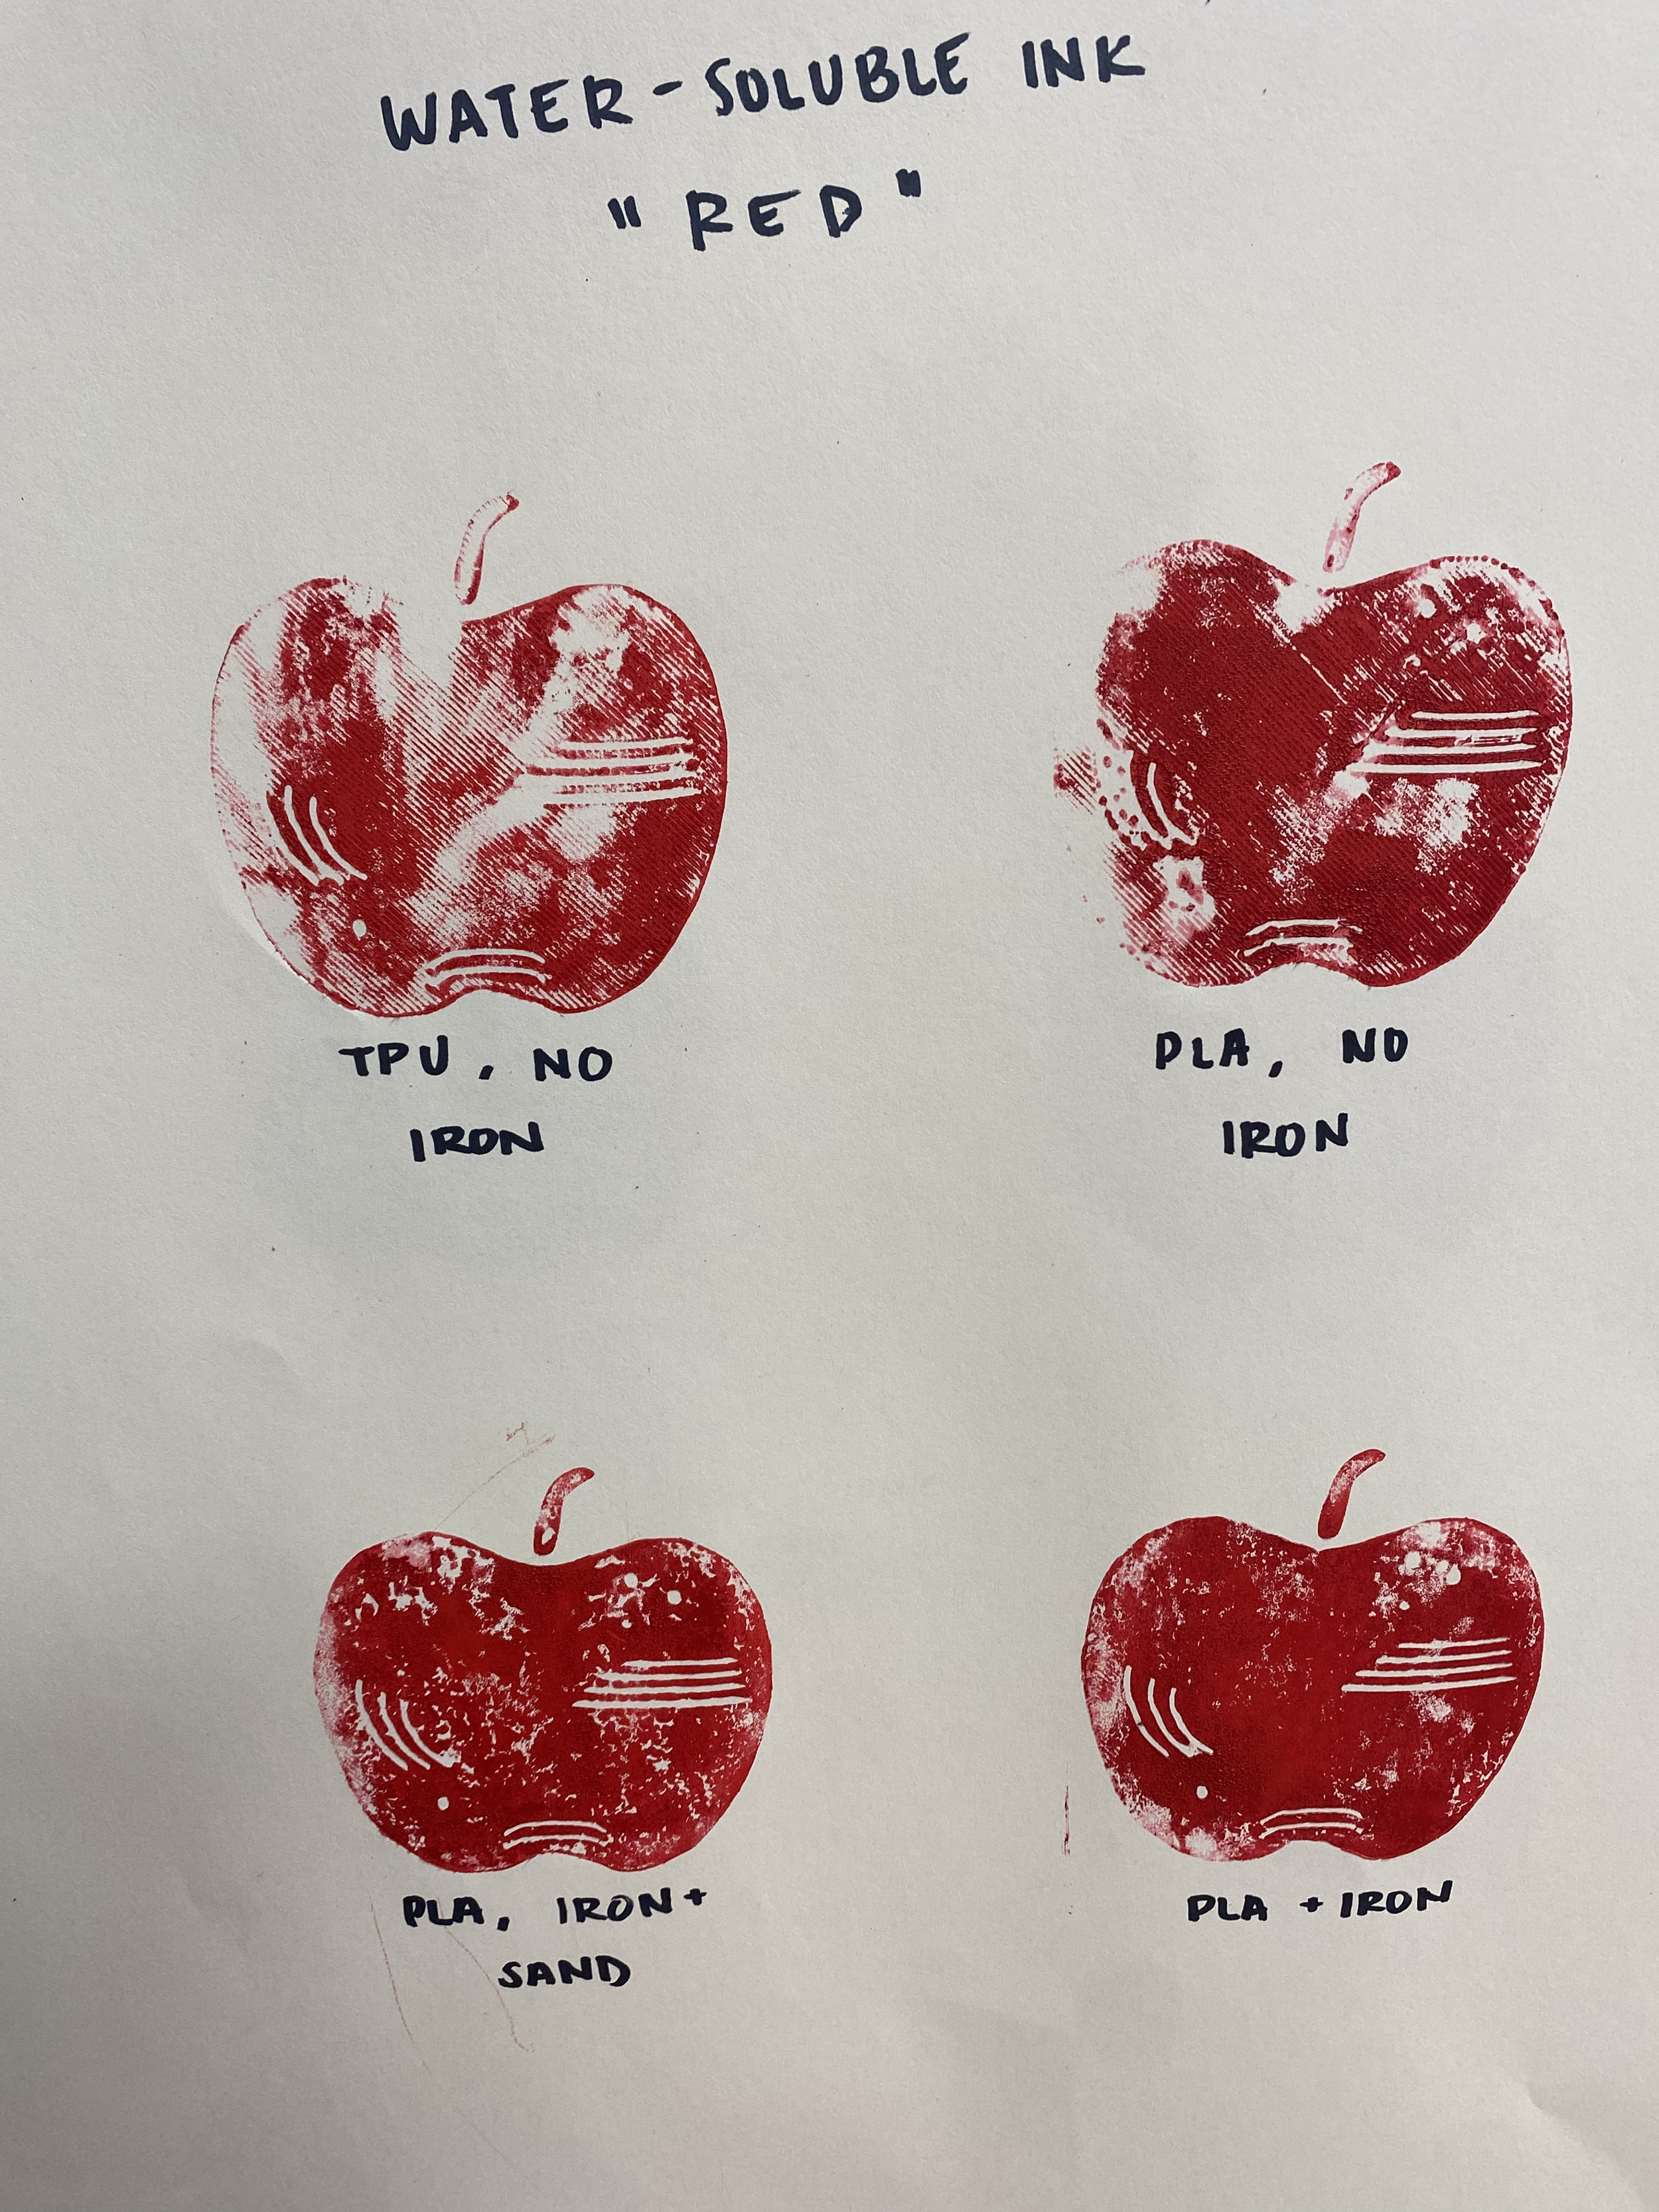
As mentioned above, water-soluble inks dry fast, so you have to move fast. Trying to ink all four plates fast wasn’t possible, especially since the water-soluble ink was rolling on matte (oil-based inks typically have a shine when you roll them on your surface, allowing you to see what parts have been inked and whether it’s been inked enough). Comparing these results to Prodoehl’s, they’re drastically different! But that could be due to several factors. My design is mostly solid, whereas Prodoeh’s has thin lines, similar to an outline or a stamp. Water-soluble inks don’t do very well on solid surfaces. Weather conditions could be another variable, as it’s Colorado winter right now, and the cold can affect the brayer's grip on the ink, potentially leading to uneven application and drying of areas on the design. There’s a lot to consider. According to a blog post, the paper’s GSM (grams per square meter) could affect it. However, the paper I used is 89 GSM, which shouldn’t have been an issue since anything above 200 GSM would require a press. But they mentioned that another paper at 80 GSM works best for letterpress, and they’re inferring it might work for relief printmaking.
Moving on to my final experiment of the week: relief ink. I’m 99% sure letterpress ink and relief ink are similar in that they’re both oil-based and meant for raised surfaces. The biggest difference was how they felt after drying. The experiment is the same as the letterpress ink experiment, so nothing was changed from how that process was done. Below are the results:
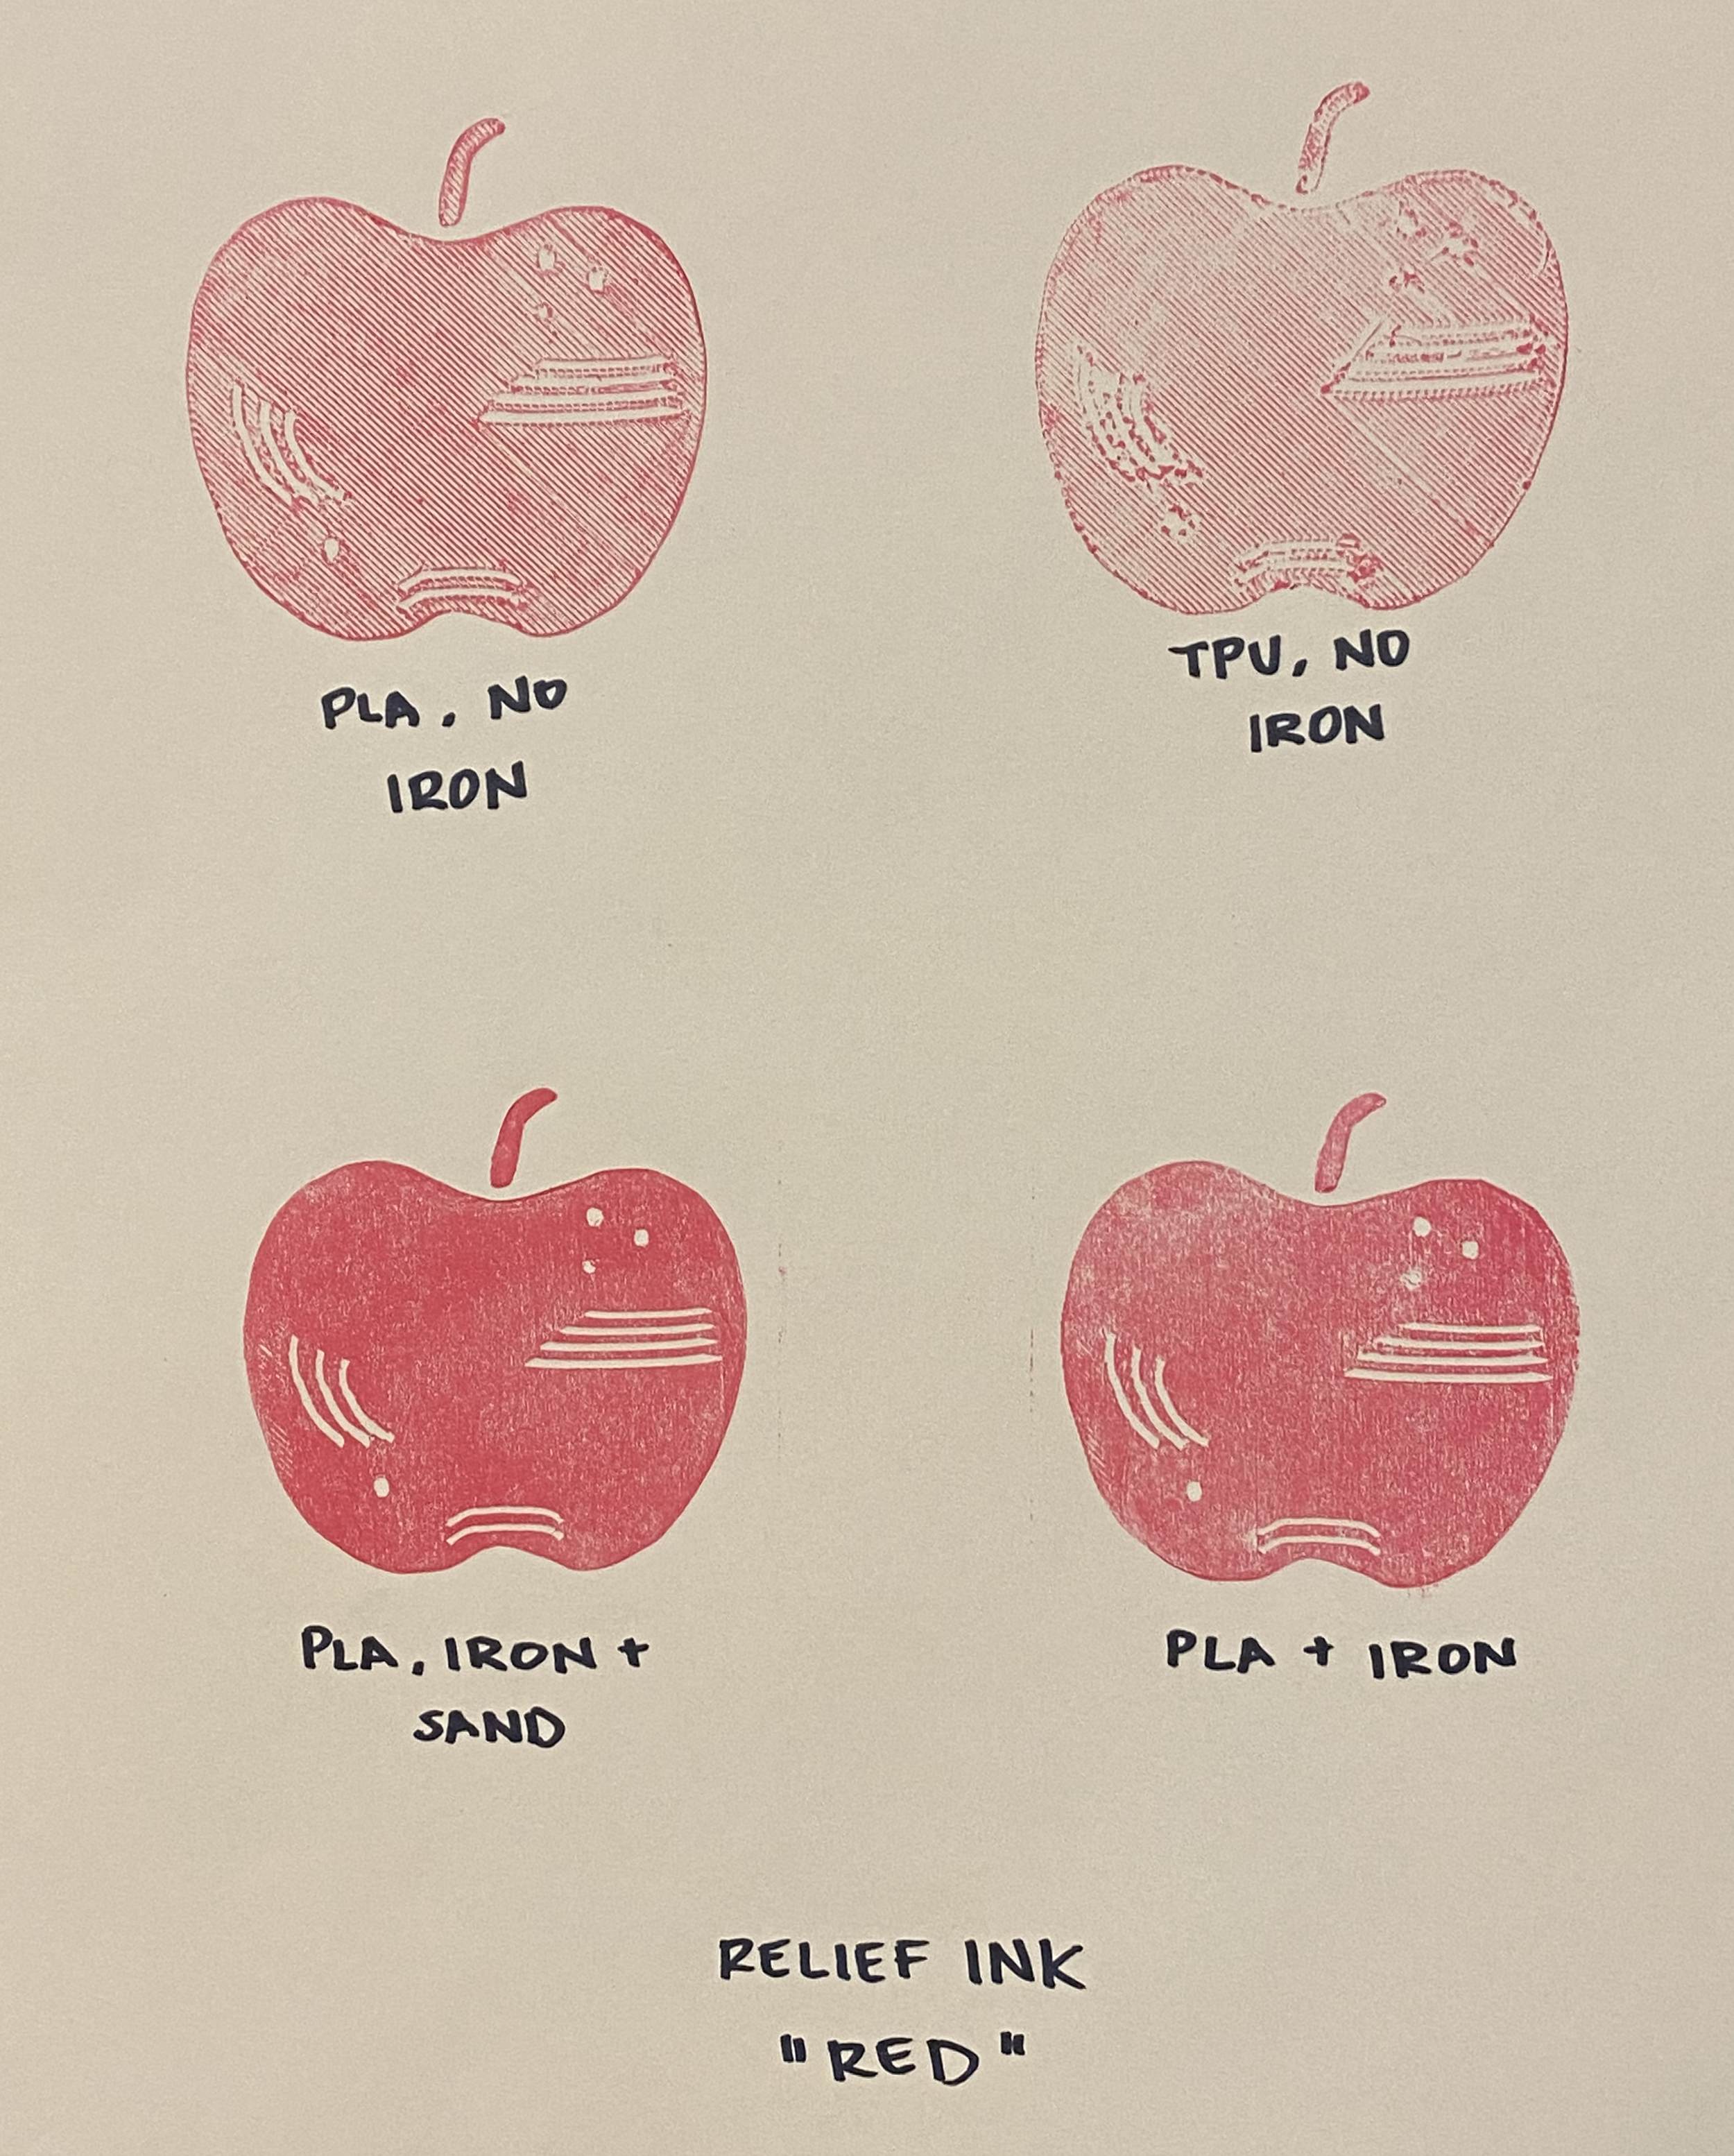
With the conclusion of these experiments, I’ve narrowed down what will be inferring my official capstone project moving forward. I’ll be using both PLA no-iron and PLA iron with sanding, layering the two together to create different textures and color depth/intensity. As for the type of inks, I’ll personally move forward with letterpress inks, as there’s a wider selection of colors for the project and I don’t have to worry about prying open ink-sealed cans for more than 5 minutes.
Over the weekend, my tasks will be as follows:
1. Writing the poem/narrative piece to go with the drawings.
2. A rough mockup/template of what the final series would be. Different editions? A book? A zine?
3. Drawings of 3D-print plates and starting to design them in TinkerCad.
4. Check what frame sizes I have access to for papermaking.