Weekly Progress Update
This week was slow for progress, mainly because I’ve been troubleshooting other aspects, and we did a week of peer feedback. Some of the feedback has shifted how I’m thinking about the final product.
One thing that I was able to accomplish this week is papermaking! Everything papermaking-related has officially been moved to my studio, and with my weekend of collecting apple peel skin, I was making paper on Monday. While I made homemade paper two summers ago (2024) with my mentor, I haven’t tested much of adding inclusions, let alone with food scraps. After watching several YouTube videos and seeing Instagram users, @kendalxmitchell and @vivleow, test various scraps (edamame shells, potato skins, celery, etc.), I decided to try it myself.
From my examples, I haven’t seen anyone use apple peels, so I decided to follow the example of Instagram user @kendalxmitchell and @vivleow, who just blended their vegetable scraps with water. I didn’t follow an exact recipe for my process, mainly from the muscle memory of what my mentor and I tested in 2024, and I hoped it would work.
Below is my written guide of my process for making the paper pulp:
Materials Used:
Kettle
Blender
BFK Reeves paper*
Lowes bucket
Tub (wide and tall enough for your frames and pulling paper)
Water
* I have access to the on-campus printmaking studio, so I was able to use scraps/torn pieces of BFK Reeves from our paper bin (dedicated to papermaking). However, you can use other paper scraps you have, but know the texture/results might differ slightly.
Paper Pulp Process:
Rip the desired amount of BFK Reeves paper (or paper of your choice) into small scraps.
Fill your kettle with water, plug it in, and wait for the water to boil.
Put your paper in one of the Lowe’s buckets, and when your kettle is done boiling, carefully pour the hot water onto your paper scraps in the bucket.
Let your paper soak for at least 30 minutes to an hour.
Once your paper is done, you’ll use a 1:2 ratio with your blender, which may vary from person to person due to differences in size.
Place one part of your soaked paper in the blender, then fill it with two parts tap water.
Blend the mixture for 30-seconds. If it still looks clumpy, blend for another 15 seconds.
After, place your paper pulp into your tub (fit to the size of your papermaking mould)
Continue steps five to eight for your desired batch. (2x with the blender made approximately 8 sheets of 4”x6” paper.)
Then add roughly four cups of tap water to the tub with the paper pulp.
If you want plain paper, stop at step 10. To document my process, steps 12-16 explain how I combined the apple skins.
Collect apple peels.*
Add one part apple peel and two parts tap water.
Blend for 30 seconds or until the apple peel is broken down into particles.
Pour the apple mixture into the tub with the rest of your paper pulp.
Mix the mixture with your hand if needed.
* Some fruits or vegetable scraps might require you to boil them before blending them, such as celery, corn husks, and orange peels. But since the apple skins were thin, I decided to skip this step.
Results:
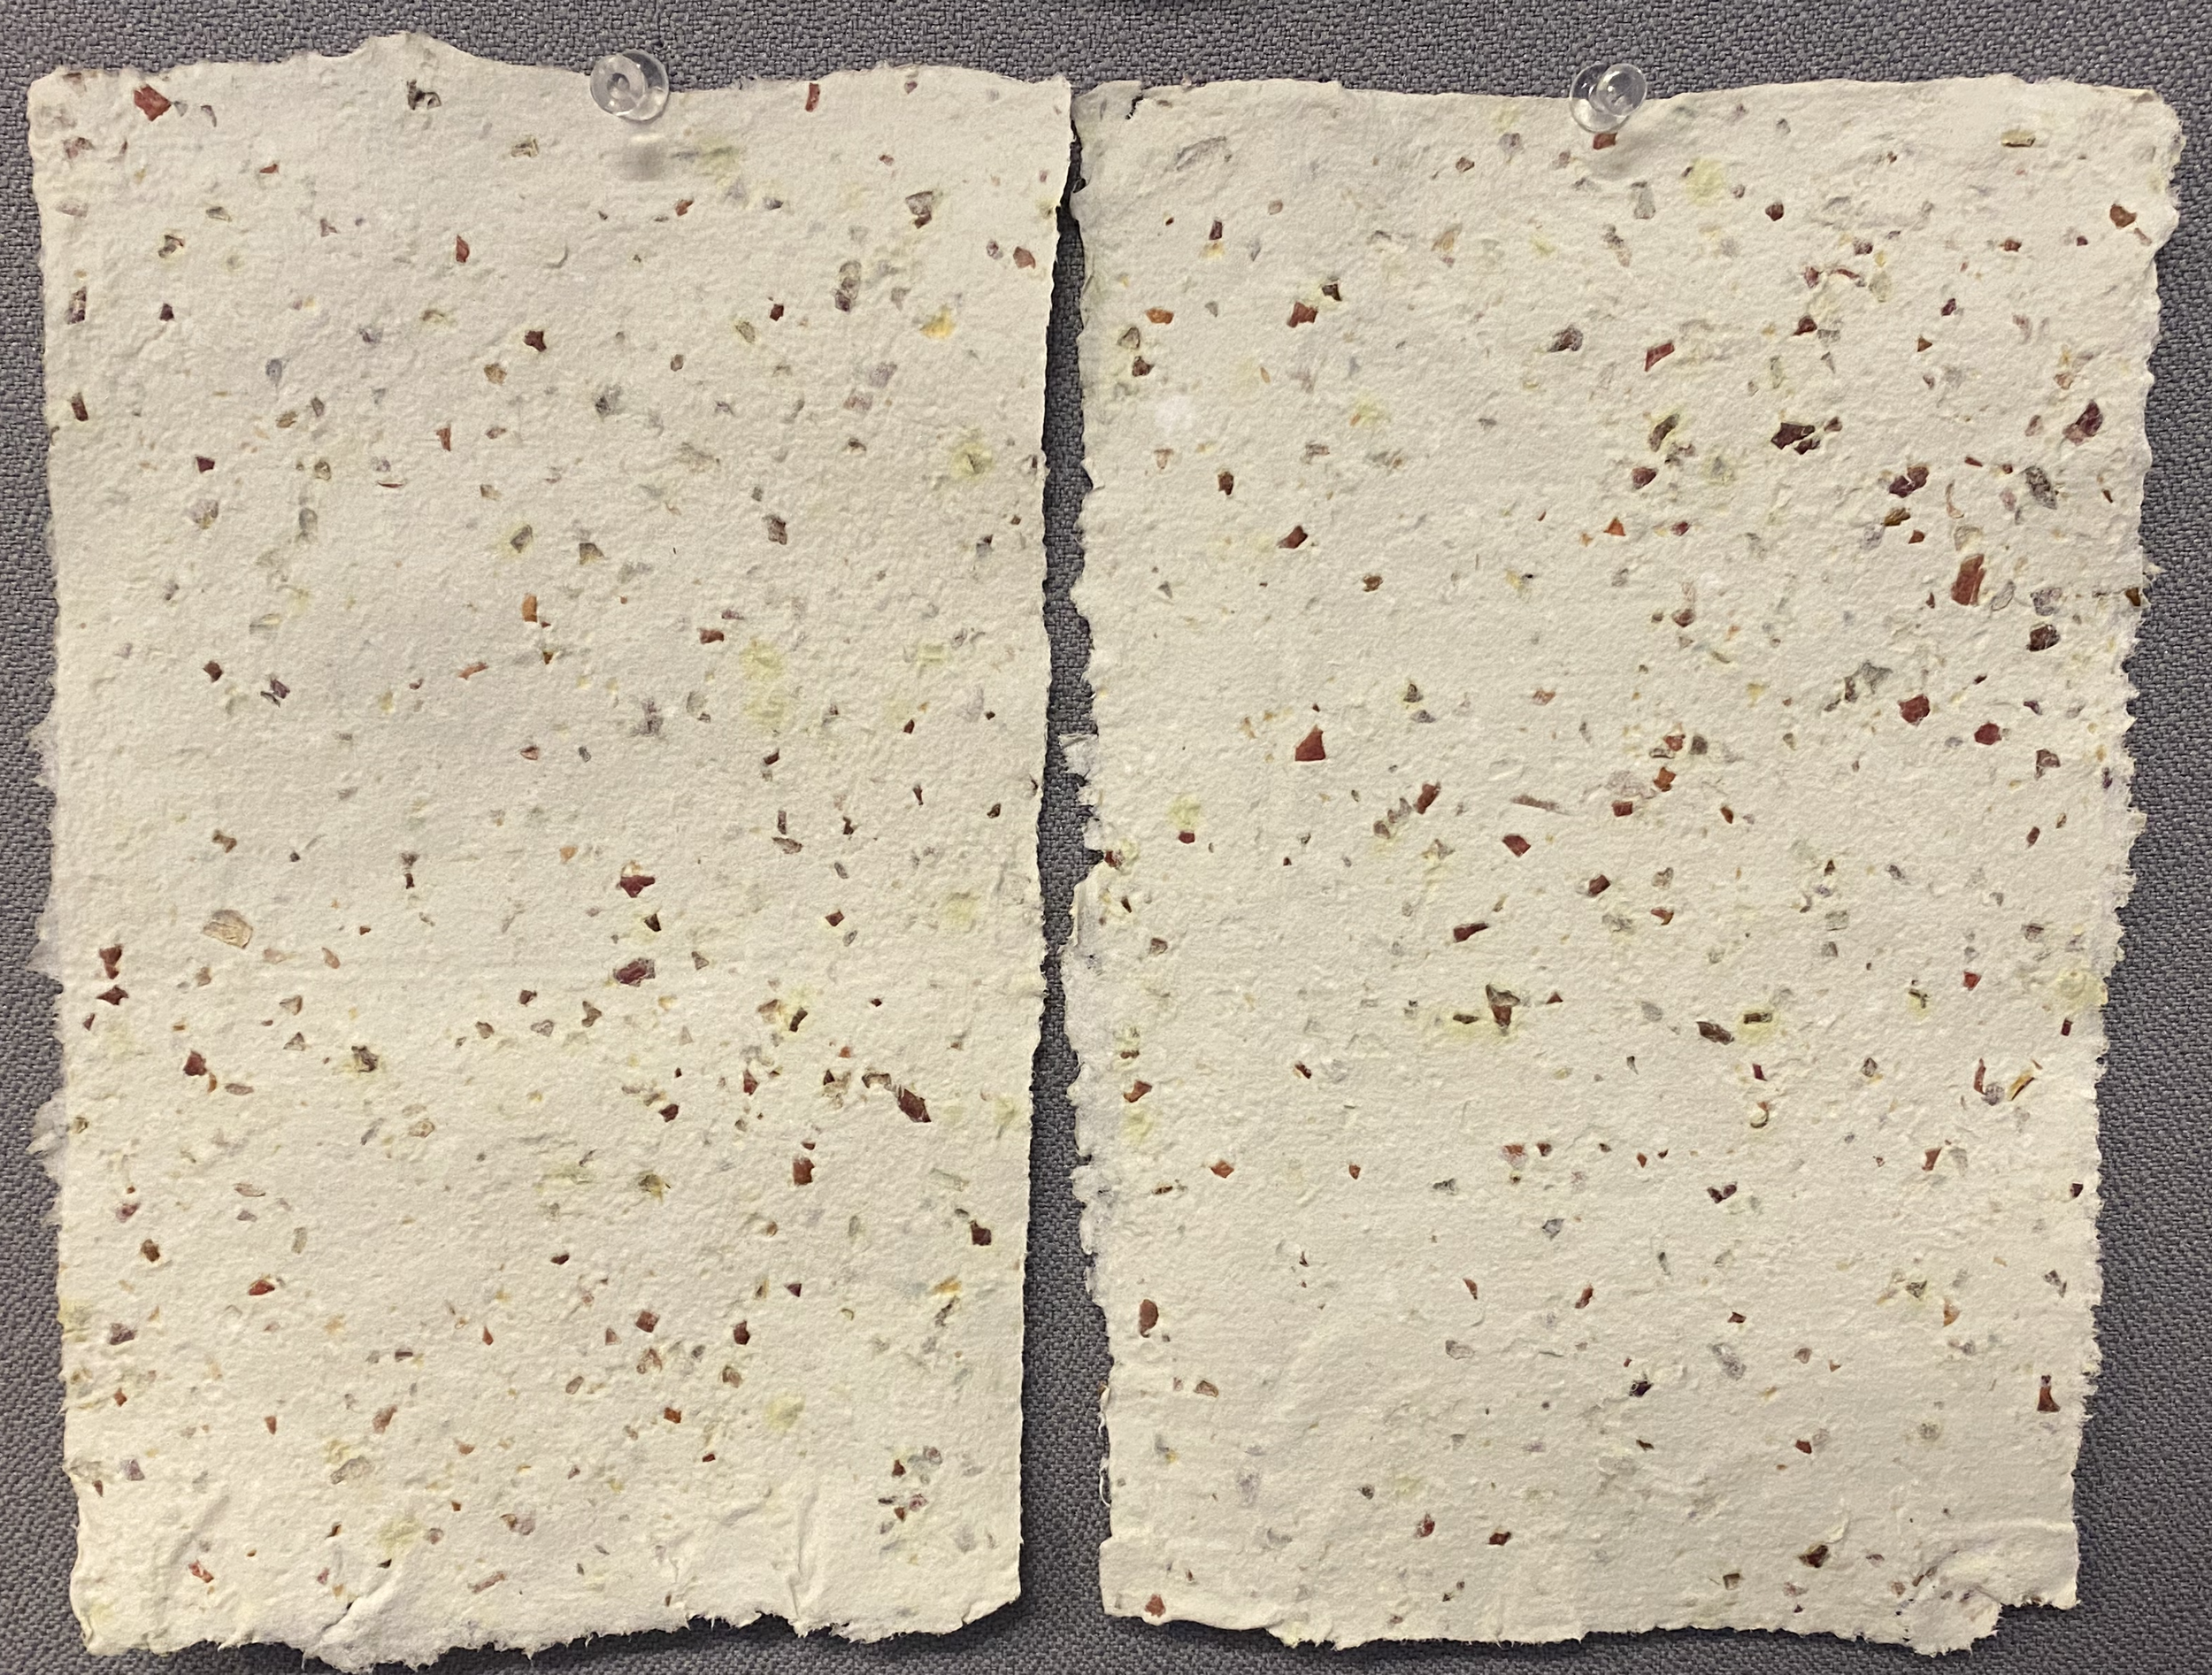


I’m pretty happy with the results of the apple paper! I enjoy the deckle, the apple skin's texture, and the additive color. The actual color of the paper looks patchy to me, mainly because I used various BFK-colored papers (white, off-white, grey) instead of keeping it unified. However, the main thing is that the paper is durable and pulled evenly, so no parts of it seem thin or weak!
And there seems to be no mold… for now. The green specks in the paper aren’t mold, for those wondering (and scared). When I first started papermaking, I wanted to add dried flowers to my pulp. During the drying process, the paper began to show green specks around the flowers, similar to what is happening here. From a quick Google search, it seems that during the wet stage of the process, the pigments leach and turn into various shades of green and brown. To prevent this, a quick drying time is essential.
I’ve completed the narrative portion of the prints, which also informs the project title. The writing portion is rough and is still being workshopped and edited.
Temple
Filling the space,
while my core starves
Tough exterior,
learned thickness
Ripping past the seams,
cold, plush, flesh
finally freed.
For almost a year now, my studio practice has used fruit and vegetable imagery to process and discuss my emotions, memory, and the idea of transformation. While most fruits are used as common symbols for topics like fertility (pomegranates), femininity (figs), or power and wealth (grapes), I want to give these fruits and vegetables new, personal, symbolic meaning in my stories.
Feedback:
During classes seven and eight, I was able to show my in-progress work to peers, also in the capstone, and provide feedback to one another. My group seemed to enjoy my ideas and experiments, but they mainly discussed how I would present my work. They pointed out that the process and experimentation themselves are also important with the final product. The group agreed that the installation of my work could include and present my prototypes and test experiments, with the results being of my individual prints and narrative. It was also mentioned that it could be interesting to have “tokens” for people to take home. Like homemade paper that they could customize to themselves and their story.
I really like the idea of the installation being based on my findings and experimentation. I’ve done some research to look for other artists, specifically printmakers who included poetry with their work, and found an artist by the name of Alice Leora Briggs and their work titled The Room. Briggs doesn’t specify how this was displayed, but based on their images and description, it seemed like they were individually hung in reading order. Which might be the route I take for displaying “Temple.” Then the question arises: should I frame the individual prints or hang them directly on the wall? While framing would make them more unified, since “Temple” talks about my body and my relationship with it, keeping it unframed and showing the “raw” paper and rough edges might align with the narrative. However, I might also bind one copy as a book, since that’s how I originally structured it.
Lots of questions and decisions! Over the weekend, I’m going to collect some orange peels and get ready to make orange peel paper next. Then I’m going to use Procreate to digitally design my 3D prints, import them into Tinkercad, and hopefully 3D-print them in PLA (iron + sanding and no iron). On Monday, I’ll hopefully start printing and have an example print on handmade paper to show my peers for Tuesday’s Prototype 1 demonstration.